
Best practices for utilizing Lens Cast Correction (LCC) in Capture One
It’s time to revisit the subject of LCC’s (Lens Cast Calibration) within Capture One and how they benefit various photographic needs, within the typical use cases of photography, technical camera photography as well as within the world of art reproduction.
The primary and original use for the LCC was to equalize color and tone variability of technical camera lenses when captured digitally. With any lens there is a natural amount of vignette that can manifest from the center of the capture to the edges, and most of the time this isn’t an issue for image making, in fact I typically like the natural subtle vignette of optics. When capturing with traditional view cameras or technical cameras however, heaver artifacts and asymmetric vignettes can present that need mitigation, especially when pushing out the edges of the optical projection to the sensor.

The process of creating a LCC to remove lens cast is simple and straightforward:
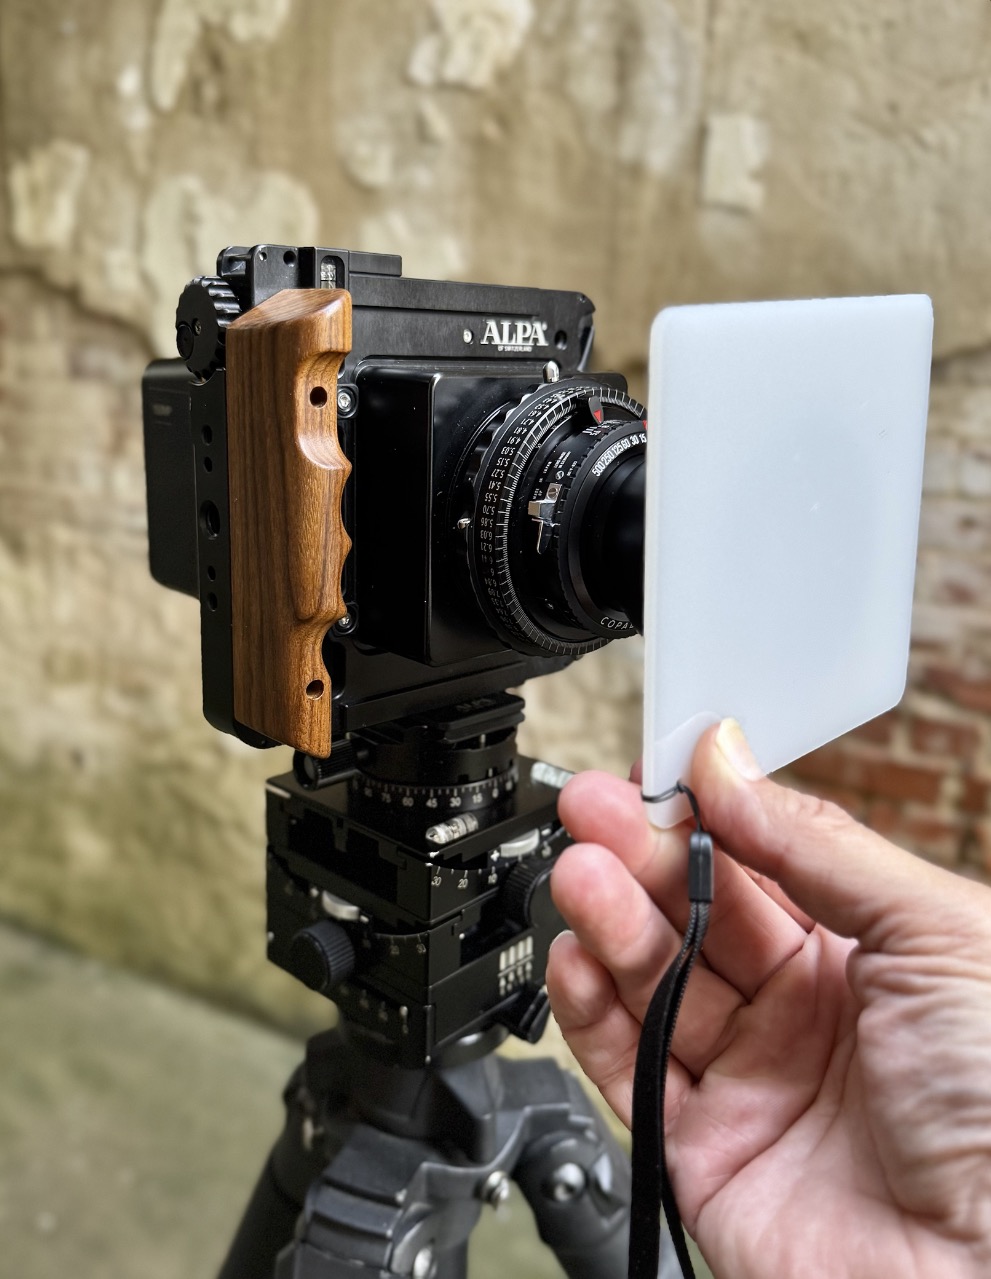
• At the time of shooting your practical shots, and again for any new & unique configuration of camera movements, place a piece of milky plexiglass (like the Pocket LCC Lens Cast Correction Tool) at the lens and make a proper exposure for the LCC process which typically about +2 stops of time increase over your practical exposure so that the rise of your mid-tone to highlight histogram bubble is in the right 2/3rds, making sure not to clip the edge of it off the overexposed side.


• Import your practical images and your raw LCC files into Capture One
• Identify the LCC ‘characterization image’ within the thumbnails, right-click on it and ‘Create LCC’, making sure that ‘Color Cast’ and ‘Enable Uniform Light’ boxes are both checked.


• Select the LCC and any images you want to augment with the LCC, right click and ‘Apply LCC’

Viola! The color cast and vignette are removed.

The LCC essentially identifies the color cast & light fall off and Capture One basically applies a reverse curve to the custom color/tone mask that the LCC has identified, removing them from the RAW source image. (You must shoot RAW to take advantage of this tool!)
It is important that the image to serve as the LCC is properly exposed to the brightest portion approaching the limits of the sensor, typically in 8-bit exposure numbers you want to see ~245 as your brightest value as this brings up the number of shades of change in the lower color numbers where it’s pivotal to have more rather than less shades of grey to gracefully reverse vignette shadows and color pollution.


Related to this subject is the use of a portion of this same LCC process for uses within Art Reproduction in order to equalize out light on set for an added level of precision, discussed in The Reproduction Lighting Trick that will save you HOURS.
For More Resources
from Brad Kaye and the Medium Format Experts


Follow Us, & Subscribe to Our Newsletter!


Discover more from Capture Integration
Subscribe to get the latest posts sent to your email.

