
Convert Negative Film to Positives for Printing

Do you have a negative film that you want to create prints from but don’t have a scanner? Well, here’s a quick yet effective way to use your digital camera to do just that! First off, there are a few things you should know about copying any flat material… The higher the resolution of your capture device, the better the results. Also, using a true macro lens that is “Flat Field” will also make a significant improvement in your final output. I am fortunate enough to have a Phase One XF IQ4 150MP camera with a Schneider Krueznach 120mm Macro lens to use for this demonstration. If you do not have access to a good quality macro lens, choose a longer focal length lens as it will have less distortion, though you may see some softness on the corners due to the curvature of any non-flat field lens. The smaller the neg, the more important a close-focusing macro will become.

You’ll notice I have set this up as a tabletop shot using an old fluorescent light box as my light source. A modern LED light source would likely provide more accurate color and even illumination, especially for larger negatives like 4×5 or larger. It helps if you have a diffusor over the light source; in this case, a high-quality white polycarbonate panel is used. You could use a strobe as well, but if you’re photographing a lot of negs, the flash will get annoying very quickly 😉 I happened to have a heavy-duty Manfrotto tripod with a horizontal arm to allow me to hang the camera over the light box and shoot directly down on the neg.
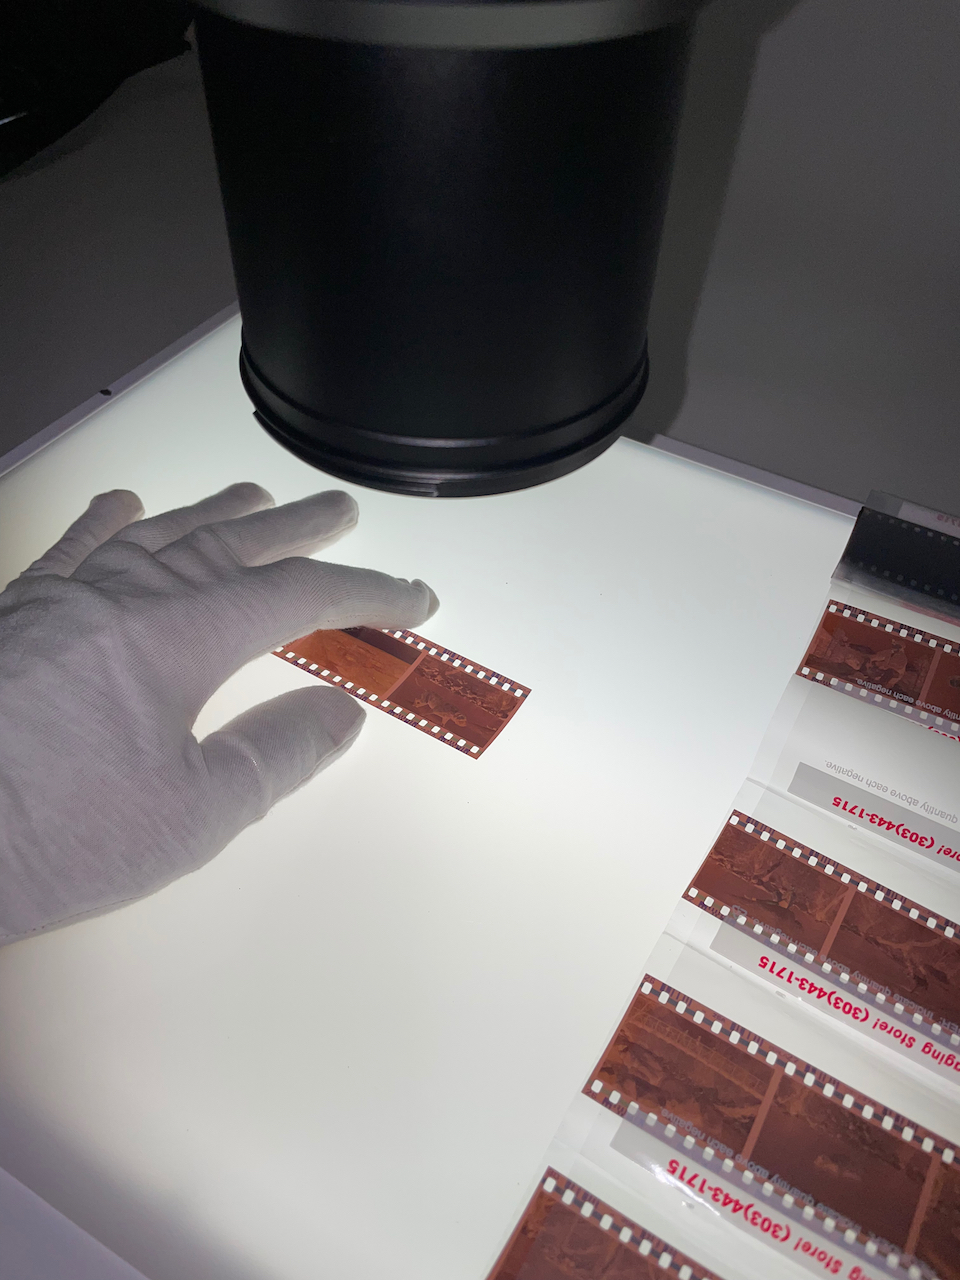
You’ll want to clean your sensor, lens and light source to remove any dust, etc. Likewise, it’s a good idea to dust off your negs, generally with a blower brush as you do not want to accidentally hit them with the propellant or water vapor that sometimes comes from compressed air cans or a compressor itself. Cotton gloves are a MUST if the negs are even remotely important to you… I assume they are, or you likely wouldn’t bother copying them in the first place! I recommend making a custom white balance directly off your light source, though “Auto White Balance” on most modern cameras will suffice.

Next, you’ll want to level your camera to be as perfectly perpendicular to the neg as possible and center the neg in your cameras viewfinder. If your camera has live view and a built in level, these can be helpful in setting up to shoot more easily and quickly. Fill the cameras viewfinder as much as possible with the neg while still allowing for sharp focus. Again, this is where a macro lens can be incredibly helpful! I prefer to shoot tethered to Capture One on my laptop computer as it gives me a larger screen to confirm composition, level and focus.
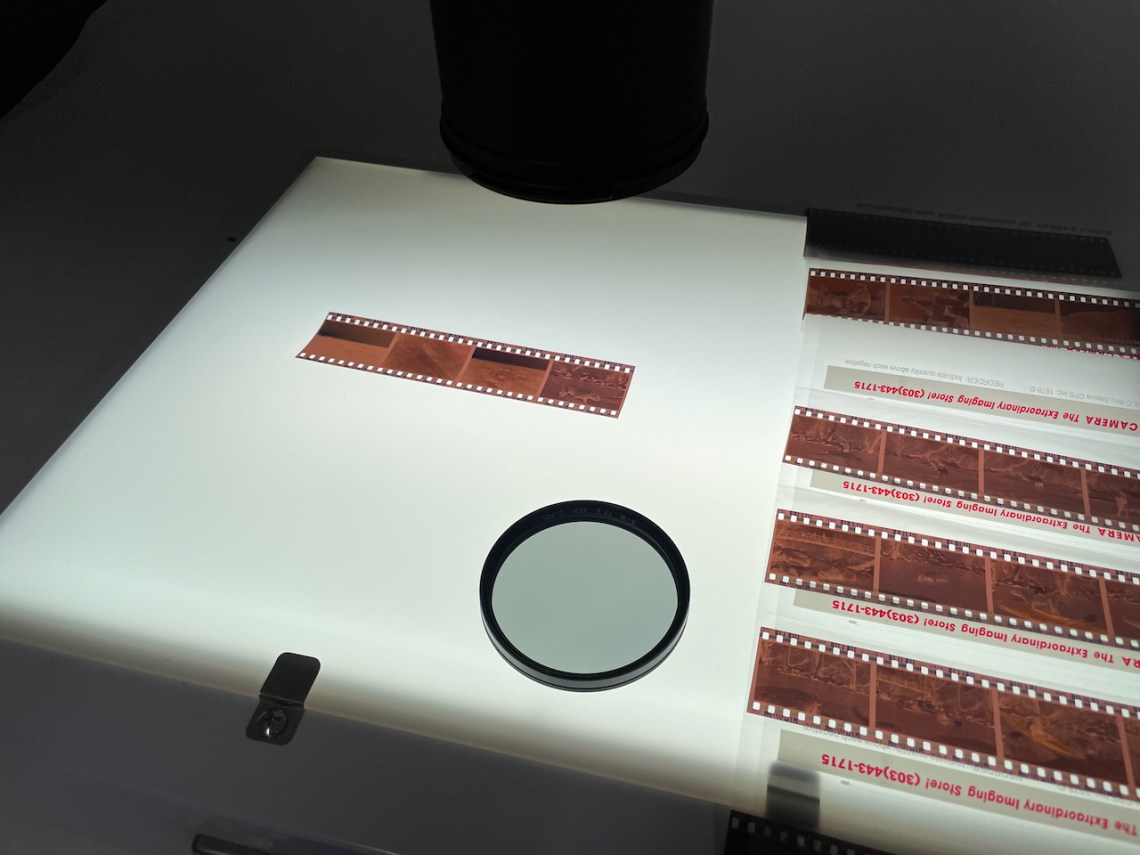
Though you are photographing a flat piece of film, some may have a curve in the emulsion of have warped over years of storage. You can carefully lay a piece of thin framing glass over the neg to hold it flat against the polycarbonate. If you get reflections on the glass, try using a polarizer on your lens to eliminate it. A middle of the aperture range is generally going to allow for sharper files, try to shoot at f5.6 to f11 while also keeping your ISO low enough that you do not introduce unwanted noise in your files. If your camera can shoot RAW files, they are always preferable to any other file format like tif or jpg.
You’re ready to capture some images…
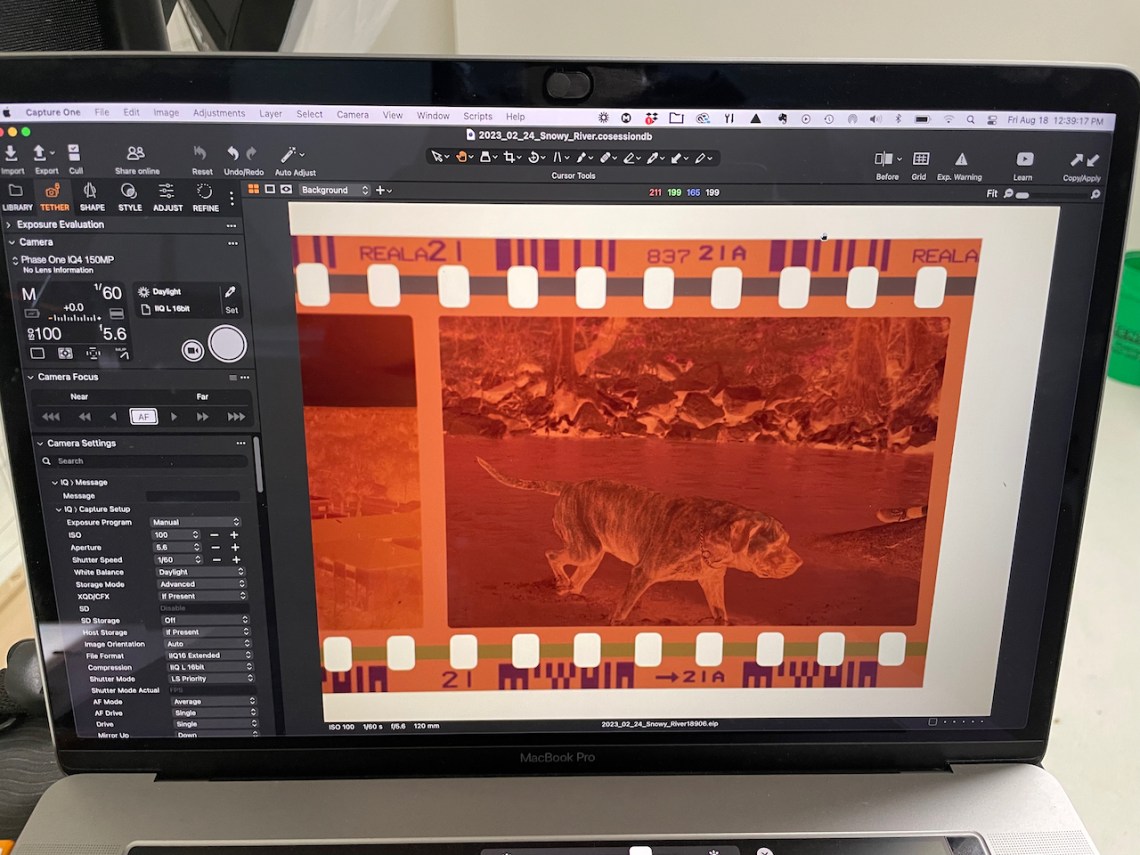
When you look at your images, they will be either negative color or negative black and white, depending on the original film emulsion. How do I make them into printable positive images? I’m glad you asked.


In the screenshot above, you will see I’ve simply gone into my RAW converter’s “Levels” tool (in this case, Capture One Pro) and pulled the lower black point from the “0” value all the way to the right and then grabbed the lower white point from “255” value and pulled it all the way to the left. I then created a pre-set and style so I can shoot directly into Capture One, and it will create the Negative to Positive conversion for me on the fly!


Here are a couple more examples of conversions.
Have fun printing your new Positive files! Visit our rental page if you are interested in learning more about renting a high-resolution system like the Phase One 150MP camera.
Discover more from Capture Integration
Subscribe to get the latest posts sent to your email.

