
The Right Filters for Achromatic Shooting


Phase One Achromatic Digital Backs are designed to allow you to have complete control over the image by choosing the correct filter for the desired look. The IQ3 100 Achromatic and IQ4 150 Achromatic backs see the full spectrum of light because they have the Bayer Color Filter removed. They have also removed the IR filter that we typically use for color (RGB) photography. Then you can choose the desired effect by using a specific IR Cut Filter.

The ability to see thru these dark filters to focus and compose in real time allows you to use this new back with more control than ever. Many agree that this feature alone is a game changer. As I think back to the very first Achromatic designed from Phase One that did not offer Live View, we were always guessing at the focus and exposure. Infrared exists outside the visible spectrum, that’s what makes the Live View feature of the IQ Achromatic backs so essential. Please note below a chart that shows the wavelength in nanometers (nm), this is how the filters are labeled.

The Phase One IQ series brought us the iPhone quality screen with Live View and the ability see crisp focus thru the filter you are shooting with. Add a Infrared Filter and get an image in BW that looks just like BW Infrared film when exposed with 25A filter and processed. It has really become WYSIWYG (What you see is what you get). The first thing I do is try to compose the scene with the first filter I am going to shoot with. I have got into a routine of shooting from 486nm and up. That way your exposures will decrease, and if you stay in order, they will not be as dramatic between shots. I cannot stress enough the double and triple check on your focus. The focus will shift as the filters move thru the spectrum. So I check focus in Live view, with the filter I am exposing, each and every time. I like to shoot one in every wavelength if possible, 486nm, 690nm, 715nm, and 830nm. We source filters from B& W, Heliopan, and Singh-Ray. Many of the very large filter such as 105mm for the 35mm Blue Rings lens can take weeks to come from Germany, so plan ahead.

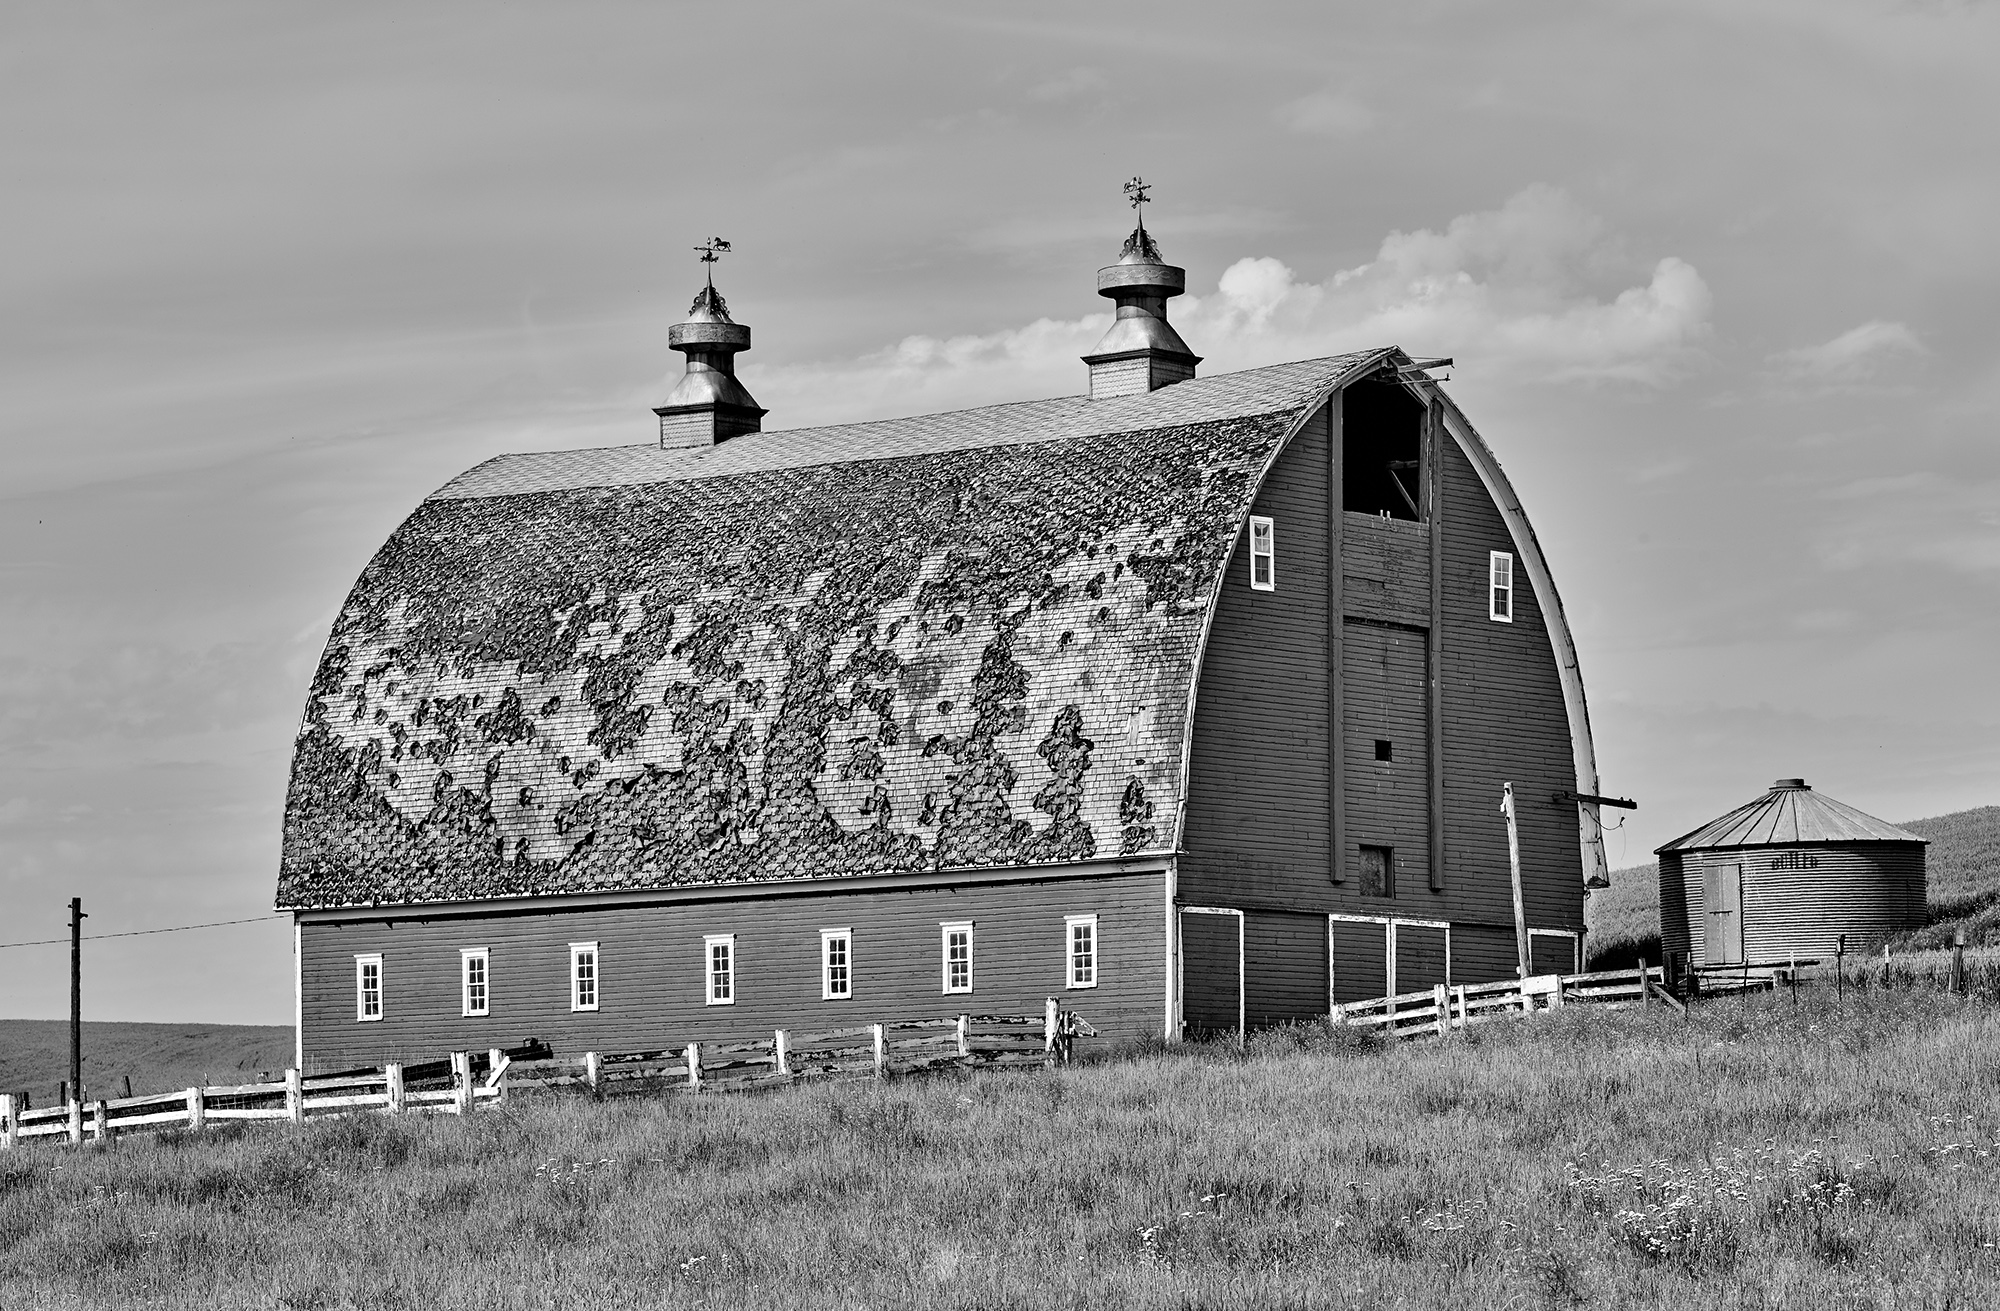
I have been fortunate enough to capture some fun images with the IQ3 100 Achromatic Back with a variety of filters thru my travels. You will see I have labeled the images with the type of filter that was used. Many of these are interesting to see how each filter changes the contrast and feel of the images. In some cases I also include the color image for comparison. Currently there are 4 common filters being manufactured right now for black and white photography with these Achromatic digital backs that I think you should consider. The detail you see from the traditional Black and White filter 486nm is just astonishing. As you move thru the 690nm and 715nm filter, things start to get more surreal. You will notice trees and most foliage will turn white because they reflect a lot of IR. The sky always looks so dramatic with the 830nm, almost black at times. It is very important to keep in mind that you need to use a filter because without a filter, the image is not focused at a certain wave length and you tend to get soft images with IR contamination.


The images above was a real eye opener to just how incredible the Phase One Achromatic design is. There is not currently any digital back manufacture, who has developed a product so robust and powerful as Phase One. When I compare the attributes in these 100 MP files, I am amazed at how much detail and micro contrast there is with the bayer filter removed. Sure that means you must own a digital back that shoots only black and white images. But by removing that bayer filter, it opens endless possibilities to create images with a different look and feel. I have cropped a few details at 100% for you to see from the scene above.


As you slide between these wave lengths from 486nm to 830nm, keep in mind that these effects may appear to be dramatic, but the differences between 690nm and 715nm can be ever so slightly. As you tone your images, you will see details in one and highlights in another, you may choose which one is a better starting point to edit. You also will see that the higher Infrared Cut filters will produce tonal seperation well beyond how your eye can see it.
For example below, we got out of the car just to take a look at this scene in the back country of Death Valley. I was not even going to take my camera or tripod out because it was super bright and hazy. I saw the moon and some of these peaks that interested me. It was not until I returned too my room that night did I realize how the 830nm filter had cut right thru these tones. I never recall seeing the separation. The is straight out of Capture One shot thru the 830nm filter. I also have a pano, and even after cropping it a hundred times, I come back to this very first one I processed.


Moving thru Death Valley, I kept in mind what I learned about shooting into hazy skies and at high noon or sunset. We headed up the mountain range to the top of Death Valley, and area referred to as Dante’s View. It was a balmy 33 degrees with a strong wind. We hiked up to top of the range so we can shoot down into the valley. I took this cell phone picture which I now compare to the scene. The 830 filter cut thru that haze to produce a dramatic scenic view image from the top of Dante’s View.


I learned a lot about why some scenes tend to look more muted than others. And why some trees and some foliage tends to look bright and contrasty sometimes vs other times when those look dark and muddy. I was editing an image and found that the sun was popping in and out of clouds. That changed the exposure, but most importantly, the contrast. As the sun reflects off leaves, foliage, grass and even clothes, we can see the brightness and contrast of those tones change. The images below show that. As you slide between the two, you will notice that the tree gets brighter and more defined. That is when the sun popped out and caused the light to reflect more, causing a more dramatic image.


Black and white and Infrared have always been a favorite of mine since I experimented with 35mm and 4×5 film in college. We used various filters to produce different contrast and tonal ranges. 25A was most commonly used filter to produce this infrared look with the special Kodak Infrared Film . I have reached way back into my archives to share with you a 35mm Infrared image I created almost 36 years ago. I still remember how magical the image looked as it started to develop in the darkroom.
Please let me know if I can provide any additional technical information. Please also check out my Top Ten Achromatic Images
https://www.captureintegration.com/my-top-ten-achromatic-images-from-phase-one-cameras/


Get Yours from the Experts
Your purchase comes with dedicated technical support and premier customer service. Let us earn your business.
Contact Your CI Salesman
Steve Hendrix – 404.543.8475 – Steve@captureintegration.com
Dave Gallagher – 770.846.5223 – Dave@captureintegration.com
Murray Elliott – 631.935.3389 – Murray@captureintegration.com
Greg King – 303-728-4517 – Greg@captureintegration.com
Office – 404-522-7662 – Info@captureintegration.com
Discover more from Capture Integration
Subscribe to get the latest posts sent to your email.

