
Phase One 645XF – Auto ISO: Best Practices
While some prefer to shoot full manual all the time, the automated and automatic processes available on the XF provide safety nets that manual operation doesn’t provide.
Auto ISO is the simple idea that the camera will sacrifice the noise-free realm of low ISO for higher ISOs if that change becomes necessary to make the image. When light is falling and extending the length of capture time isn’t practical, raising the ISO is sometimes the only option.
In order to use Auto ISO in combination with Aperture Priority (Av), Shutter Priority (Tv), or Program mode (P), setup is straight forward with a single tap to the ISO value on the home screen and then only needing to enable Auto ISO with a single tap in the upper right corner (Off / Auto), and change the available ISO range if desired, dependent on the range available on your digital back.

Enabling auto ISO at this point, however, will not necessarily result in any appreciable change to your images, especially if you’re shooting in Aperture Priority (AV).
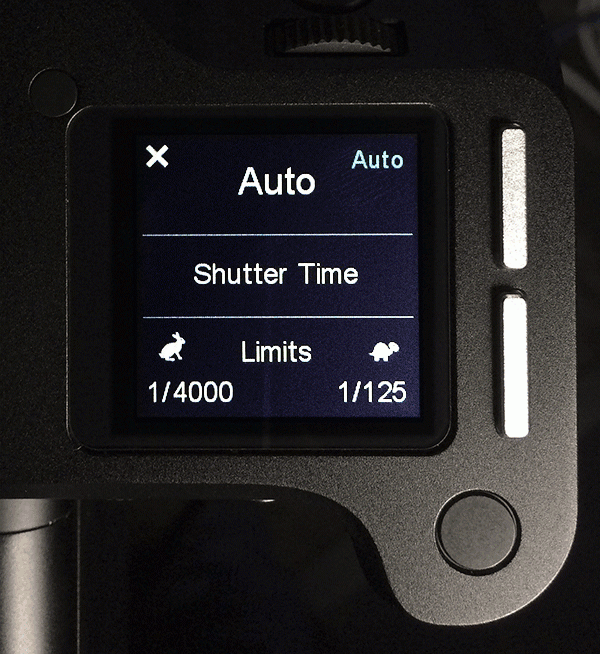
As light values diminish, and the camera is selecting a longer shutter speed in order to give you a good exposure at ISO 50, the shutter speed will continue to increase until it reaches it’s upper threshold at 1hr before it changes the ISO even one increment due to the default, non-limited thresholds in the Shutter Time field.
In order to use Auto ISO in combination with Aperture Priority, you need to change the range of the auto shutter speed to limit the speeds that the camera will be able to choose.

For handholding your camera, the long limit needs to be set to somewhere around 2/Focal Length of lens. (55mm x 2 = 110 ~ 1/125th)
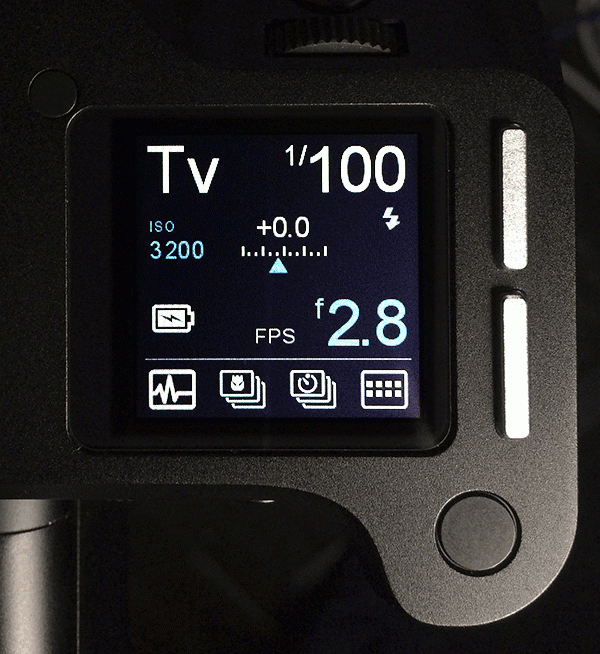
It is likely that in Tv mode and with no other changes, Auto ISO will provide some benefit. Because of the physical hard limits of aperture size on any given lens, the maximum and minimum aperture values are in a relative sense limited and provide only a limited range of exposure change as compared to available shutter speeds. (f2.8, f4, f5.6, f8, f11, f16, f22 = 6 stop range / 1/4000th second to 1hr, = ~18 stop range)

A 4 minute long threshold for exposure might be relevant for many tripod situations, or if you’re handholding something like a 55mm lens. 1/125:
Now in Program mode and with these changes, the camera will first maintain your selected low threshold for shutter speed and will attempt to give you middle of the road aperture before making any changes.
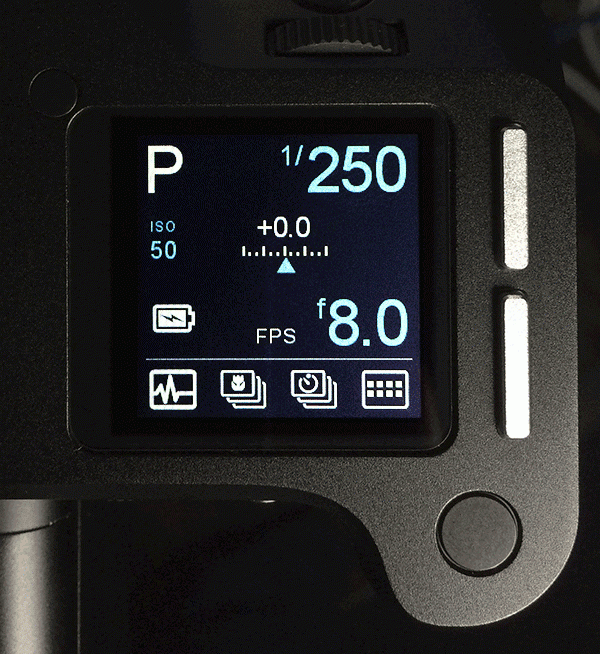
When light values drop, the first change it will make is to Aperture with the sacrifice to depth of field:
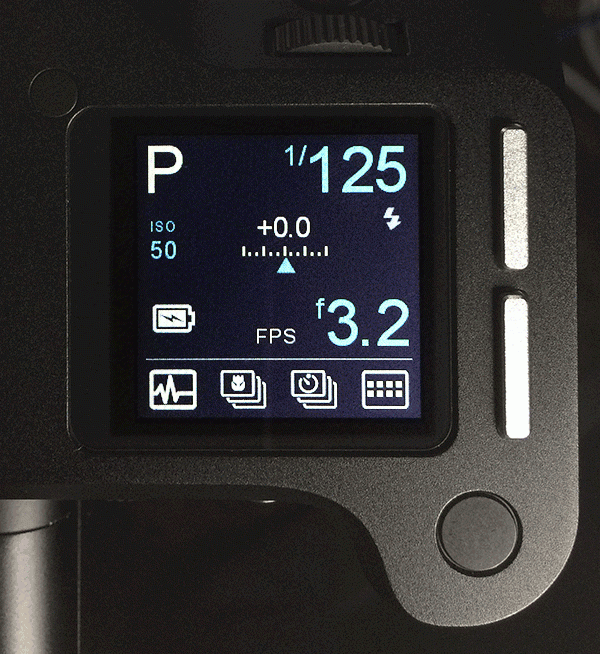
And then only after aperture has been maximized and available light continues to fall, does the ISO start to rise:
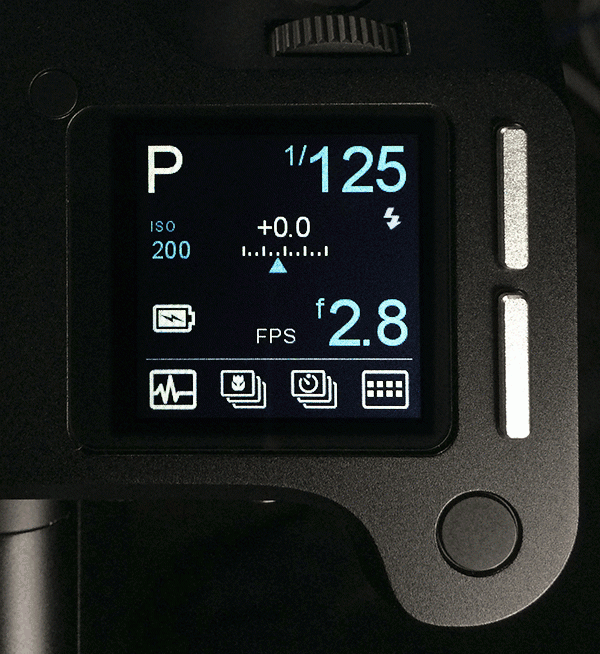
Same goes with AV mode.. with the selected aperture being maintained, the maximum shutter speed of 1/125th being observed, and as the light falls, the ISO rises in whole stop increments until the upper threshold you have set for ISO. The shutter speed will dance up from 1/125th one or two thirds in order to compensate for the full-stop ISO rises.

These restricted shutter speed thresholds can be saved into Custom Setups in order that you don’t have to make ‘permanent’ changes that you have to revert out of when you want access to long shutter speeds again in program modes. Word to the wise, manual will not observe any thresholds placed, so if you need to break from the programming set into the camera, manual is still your friend. -BK
Discover more from Capture Integration
Subscribe to get the latest posts sent to your email.

